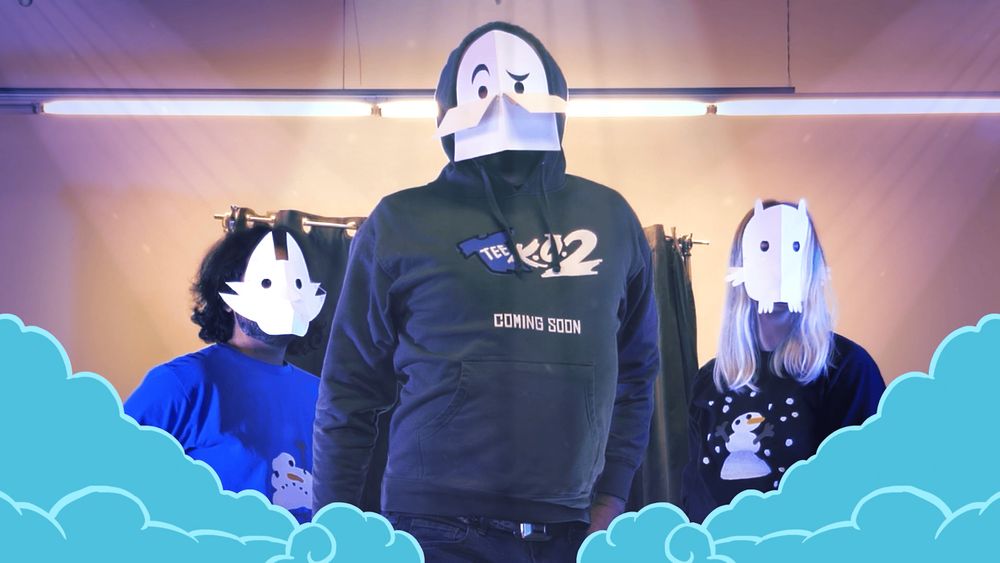
Make Your Own Tee K.O. 2 Masks!
Hey! Do you want to make your very own paper masks like those featured in the Tee K.O. 2 Announcement? Well, you’re in luck!
Go ahead and dip your crafty toe in a little DIY Jackbox cosplay. With three beloved characters to choose from: The Jackbox head himself, loveable Mayonnaise from Split the Room, and the Drawful Owl... Whoooo will you craft first?
The paper craft patterns for these masks are free to download at the links below:
PDF of the Mask Patterns with Diagrams: (link: tko2_maskpatterns_with_diagrams.pdf)
PDF of Just the Patterns (for printing): (link: tko2_maskpatterns.pdf)
Supplies needed:
- Card stock
- Cutting board
- Scissors
- Precision craft knife
- Tape
- String
- Glue stick (optional)
- Double-sided tape (optional)
- Hole punch (optional)
First, print out the pages of the patterns you want on card stock or another type of thick craft paper.
The Drawful Owl is on pages 2 & 3, the Jack Head is on pages 6 & 7, and Mayonnaise is on pages 11 & 12 of the PDF. Then follow along with the instructions for each mask below.
All the printed elements are to label the parts for assembly, and will be facing inward. Keep this in mind as you fold and tape.
Additionally, print all patterns at 100% scale. Do not scale to fit.
Onto the instructions!
Drawful Owl
Pattern pages 2 & 3 (in the long PDF)
Pattern pages 1 & 2 (in the "just the patterns" PDF)
This is the easiest mask to assemble and a great place to start!
First, cut out the main piece and the two feet. Do not cut out the beak just yet, first cut the boundary box around the beak. This will make it easier to fold.
Fold the main piece of the mask in half, printed side in.

Cut out the slots for tabs A & B, the eyes, and the string holes with a precision craft knife.
As it is difficult to cut out the string holes precisely, a rough initial cut will suffice. Then you can poke the end of a pencil through the front of the hole to round it out. Alternatively, you can cut out the string holes with a hole punch.
Fold the wings of the owl outward along the dotted line.

Fold the uncut beak in half along the central dotted fold line, so that the printed sides meet.

Now cut out the shape of the beak.

Fold tabs A & B of the beak inward.

Insert tabs A & B into their respective slots.

The tabs will overlap slightly. You can trim or fold the bit that overlaps. Then tape them in place.

Apply glue or double-sided tape to sections C & D on the back of the owl.
Then adhere the feet to sections C & D on the back of the mask, printed side up, as shown.

Cut 2 lengths of string roughly 15” long. Knot one end of each, and feed them through the strong holes of the mask.
And voila, it’s the Drawful Owl!

Jack Head
Pattern pages 6 & 7 (in the long PDF)
Pattern pages 3 & 4 (in the "just the patterns" PDF)
It’s the main guy himself, the Jack Head!
To start, cut out the main piece, eyebrows, box flaps, and flap supports.
Fold the main piece in half, printed side in.

Cut out the flap slots, the eyes, and the string holes with a precision craft knife.
As it is difficult to cut out the string holes precisely, a rough initial cut will suffice. Then you can poke the end of a pencil through the front of the hole to round it out. Alternatively, you can cut out the string holes with a hole punch.
Glue the provided eyebrow shapes to the front (unprinted) side of the mask. You can hold the paper up to a light to see the outlines printed on the back. Alternatively, you can also draw the eyebrows in with a marker.

Fold the box flaps along both dotted lines, printed side in. It can be helpful to fold outward first and then in, so that you can see the guides.
The tabs will fold easily. The fold below the tab may be difficult to get precise, but that’s okay. That fold adds dimensionality to the flaps, and if it’s a little askew it only adds more personality.

Insert tabs A and B into their respective slots, and tape them into place. If placed correctly, the “+” signs on the undersides of the flaps should both face each other.


Next, let’s make the flap supports (color-coded red in the pattern). These are going to be little triangular prisms that wedge underneath the box flaps to keep them propped up. First fold the support in half, then in quarters, as shown below.


Apply double-sided tape or other adhesive to the unprinted side of one of the bottom quarter sections that have an “X” on them, and stick it to the printed side of the matching “X” section.
To press the two “X” sections together, you can use your pinky finger or a narrow object like a pencil.


Do this for both. Then place the supports underneath the flaps and tape them in place, as shown.

Cut 2 lengths of string, roughly 15” long. Knot one end of each, and feed them through the strong holes of the mask.
Ta-Da! Your very own Jackbox head mask!
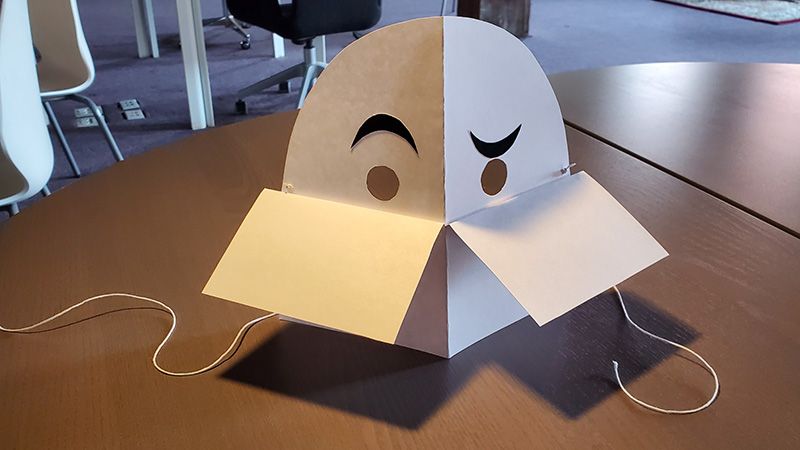
Mayonnaise
Pattern pages 11 & 12 (in the long PDF)
Pattern pages 5 & 6 (in the "just the patterns" PDF)
Hey look, it’s Mayonnaise, everyone’s favorite feline host from Split the Room!
To begin, cut out the main piece, muzzle, nose, and teeth.
Fold the main piece in half, printed side in.

Cut out muzzle slots A & B, nose slots C & D, the eyes, and the string holes with a precision craft knife.
As it is difficult to cut out the string holes precisely, a rough initial cut will suffice. Then you can poke the end of a pencil through the front of the hole to round it out. Alternatively, you can cut out the string holes with a hole punch.

Fold the muzzle (color-coded green on the pattern sheet) in half, printed side inwards.


Cut tooth slots E & F of the muzzle with a precision craft knife.
Then cut the two cut marks on either side, as well as the one at the top center.
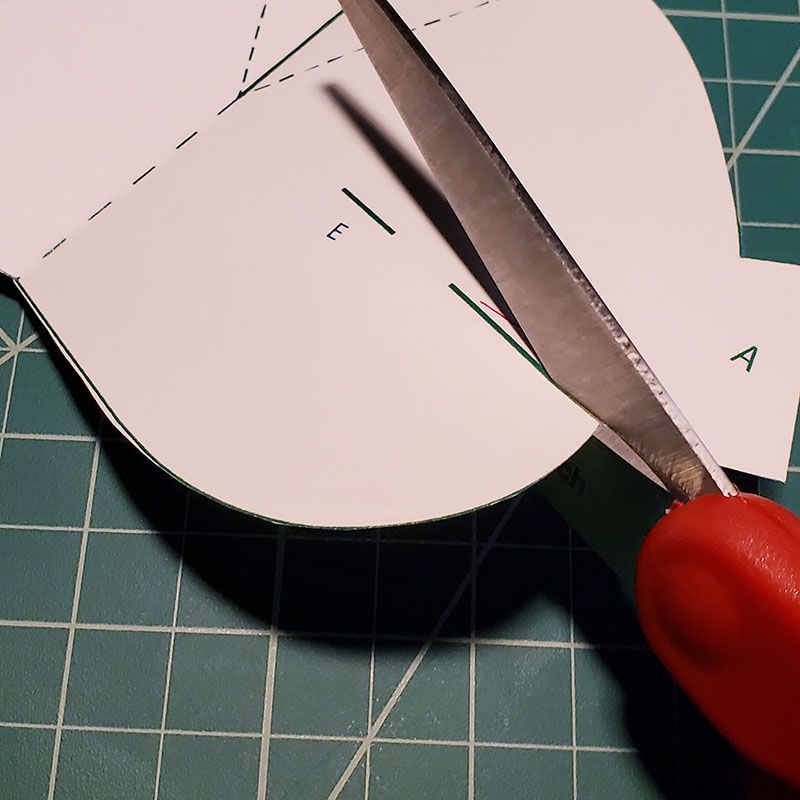
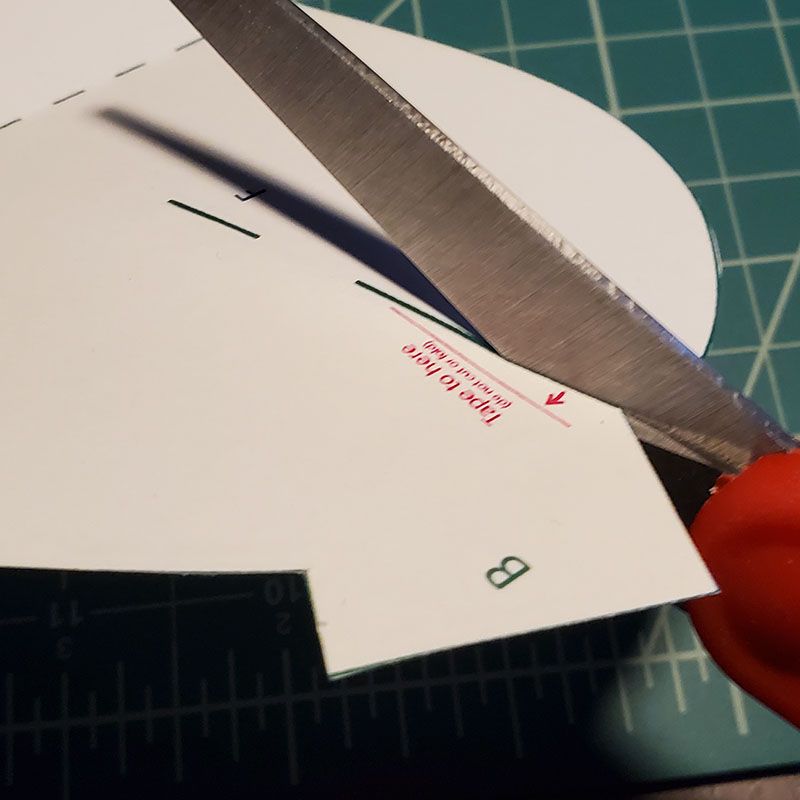
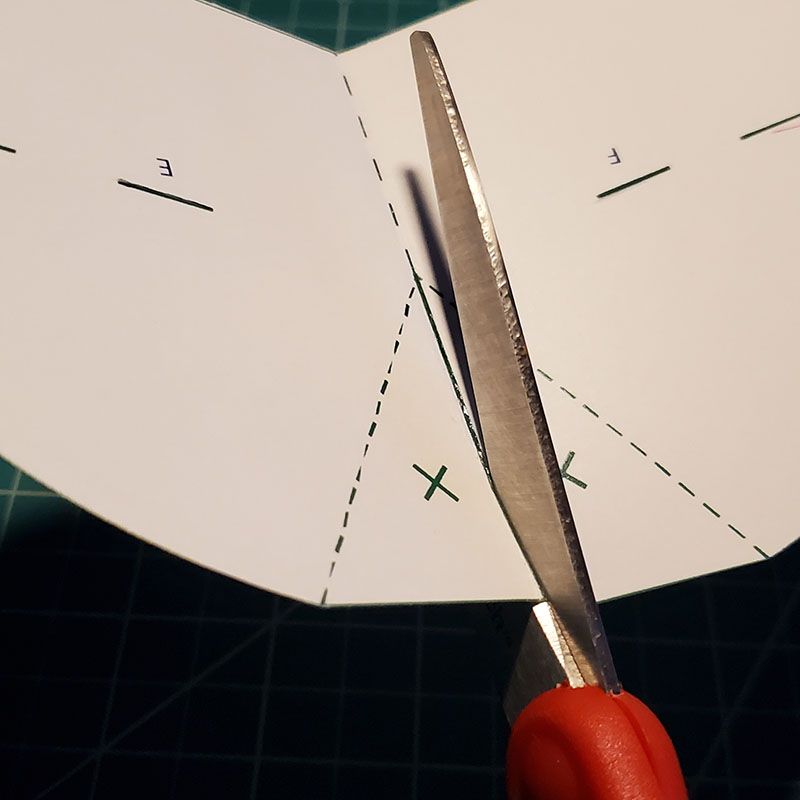
Fold along all the dotted lines at the top of the muzzle as shown. It can be helpful to fold outward first and then in, so that you can see the guides.


Glue or tape the two sections marked “X” together on the unprinted side.

Pull the cut edge adjacent to tab A on the right side of the muzzle up to the “tape to here” line on the pattern and tape into place. Repeat this for the other side. This will add curvature to the muzzle.

Now fold tabs A & B of the muzzle so that a straight line is formed around the muzzle edge, as shown.

Fold the teeth unprinted side out.

Insert the teeth into their respective slots on the muzzle. Insert them from behind, then fold them flat and tape tabs F & E in place.


Here is what the muzzle should look like when complete.

Fold the nose along all the dotted lines, unprinted side out. Again, it may be easier to fold outward first and then inward, so that you can see the guides.

Attach the muzzle to the face by inserting tabs A & B into the respective slots, then tape them into place.
Then, insert the nose with tabs D & C. The tabs may overlap slightly. You can trim or fold the bit that overlaps. Then tape them in place.

Cut 2 lengths of string roughly 15” long. Knot one end of each, and feed them through the strong holes of the mask.
C’est magnifique! It’s Mayonnaise!

Enjoy your new paper masks!
If you stage your own fashion show with them, share the results with us! We would love to see your creations. Tag us on Twitter, Facebook, Instagram and TikTok.

